Dry Brined Cherry Wood Smoked Turkey - Tutorial
This is for those folks that were wondering...
“I only have a day and a half, can I dry brine a frozen turkey?”
Even if you weren’t wondering, maybe now you are.
I picked up an all natural non-enhanced turkey (up to 6% retained water is ok), but it is frozen solid (a couple of more weeks before the fresh turkeys show up here)
So I decided to do a dry brine tutorial using a frozen bird, because sometimes, life just gets in the way.

A frozen turkey has a protective outside layer of ice glazed on it. This glaze needs to come off so the dry brine can do its magic.
I simply run the turkey under hot water until all the exterior glaze is melted off, and then I dried the exterior with paper towels.


It is now ready for the application of Harvest Brine.
Harvest Brine is a dry brine product that contains sea salt, apples, maple, sage and black pepper. The sea salt not only works to Brine the turkey, but it does a great job of helping to defrost the turkey (that’s why they put salt down in the winter, to help melt the ice)
The proper application rate is 1 teaspoon per pound, but you can use 1.5 times that amount and still be okay.
This is a 11.92 lb turkey., so that would be 12 teaspoons.
My handy dandy conversion app tells me that 12 teaspoons = 4 tablespoons
This is what 4 tablespoons of Harvest Brine looks like

It is important to try to make sure you actually get 4 tablespoons of brine on the turkey. I normally lose about a tablespoon when applying to the bird, so I make sure to add that amount back in.
This is what is looks like with 4 tablespoons of brine applied to the turkey.

Once Brine is on, the next step is to wrap tightly with plastic wrap.
Please don’t use garbage bags, zip lock bags, brine bags, etc. also don’t use pans with a cover.
The wrap needs to cling tightly to the turkey and these other methods don’t wrap the bird tight enough.
In case you are wondering why I recommend wrapping tightly (some internet resources actually recommend leaving unwrapped while dry brining, please do NOT do this)...
The salt pulls the moisture from the turkey, the moisture then mixes with the salt and dissolves it. You now have a briny mixture sitting on the surface of the turkey. The plastic wrap helps to keep this moisture against the skin of the turkey, where it gets pulled back into the meat through a process called diffusion. If the meat is not wrapped tightly, the moisture on the exterior rolls off the meat and there is less moisture (Brine) to get pulled back into the meat, potentially leaving you worse off than if you didn’t Brine at all.
Wrapped and ready for the fridge.
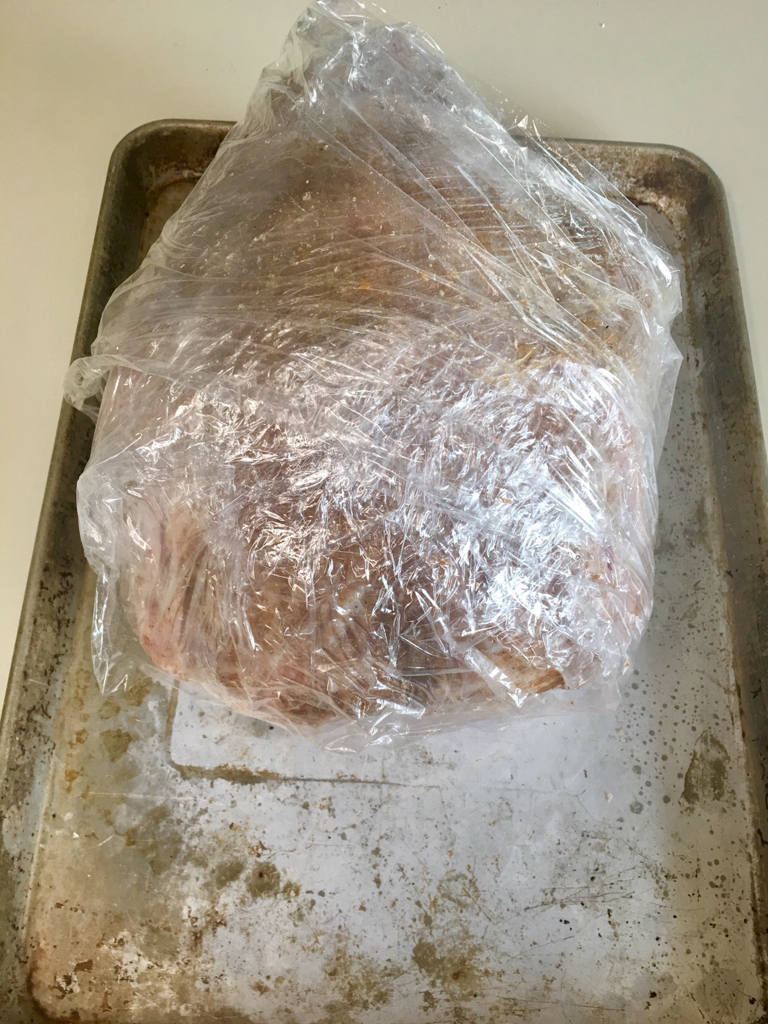
I put the wrapped turkey on a shallow pan to catch any liquid that may seep off and into the fridge for a 30 hour nap (works out to ~2.5 hours per pound)

I put this in at 7:30am Saturday morning, it came out at 11:30am Sunday, was unwrapped and air dried for a couple of hours before it hit the smoke around 1:30pm.
The turkey was frozen solid when it went in the fridge at 7:30am, by 8:30pm, I was able to insert a Thermapen (digital thermometer) all the way to the bone with little effort. How’s that for a quick thaw?
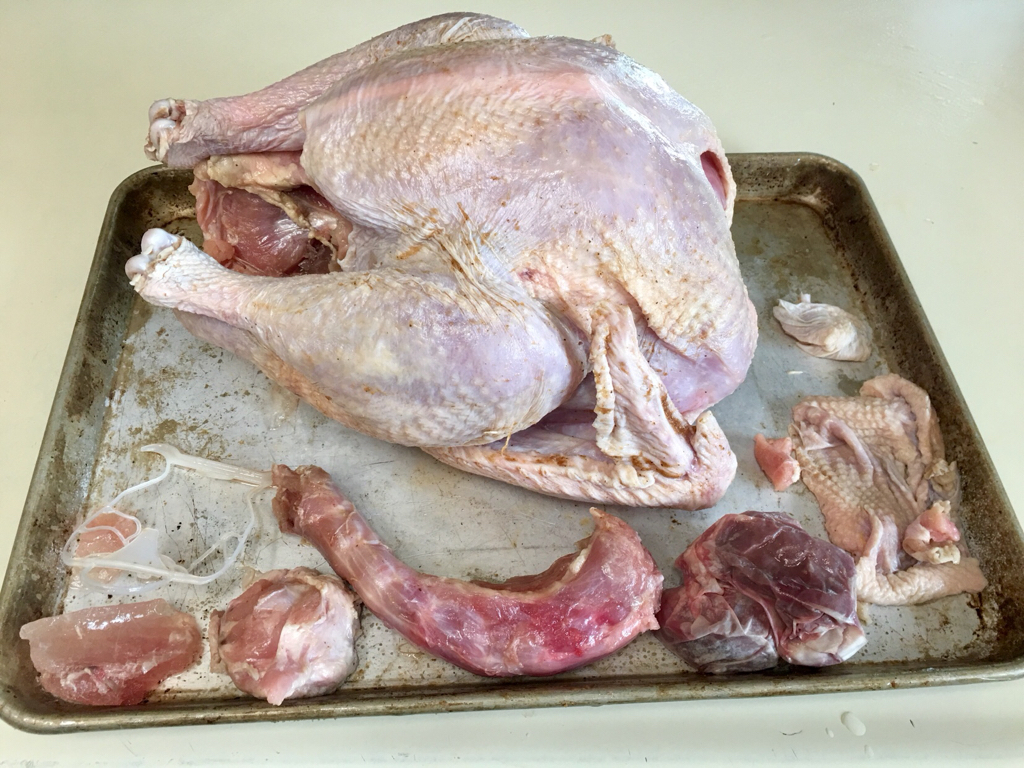
I don’t do a post rinse on the dry brine, but I do want to air dry the skin before I smoke the bird, so it is best take a paper towel and spread the remaining paste left over from the brine, across the bird evenly. This removes any remaining surface moisture as well and gives us a turkey almost ready to go back in the fridge and air dry.
Last task before it goes back in the fridge is to remove the innards and open it up so we get good air flow (during air dry and cook)
I also cut any loose skin that is inhibiting airflow through the turkey.
You can see all that was removed here.
Back into the fridge to dry.
29 hours after dry brine started on a frozen turkey, the turkey went into the smoker.
I couldn’t find my vertical roasting rack, so I appropriated the bundt cake form from the wife (shhhhh)


Let’s do something with those wing tips.
I poke a small hole right at the top of the leg and insert the wing tips.

A little unsalted butter on the breasts helps with the color as well as the skin.
And into the baby (14.5") WSM (lit an hour previously with charcoal and cherry wood, complete with water pan full of water).
2 hours in and its time to check the bird, make sure all is well (and of course take a photo)

The smoker is at 253 and the IT is 133F in the breast.
Wing joints are looking a little dark. So I’ll put a touch of foil over them along with a couple of other dark spots.
Lid back on and back to smoking.
Turkey hit 165F in the thigh and 155 in the breast and it came off to rest while I made up the side dishes.

Toasted Almonds and Feta, Green Bean salad

Sliced Turkey

The slight pink color you see on the outside edge is from the smoking process. Th holes you see is where my temperature probe was in the breast.
Served with homemade cranberry sauce, green bean salad and garlic roasted Brussel sprouts
It was a tasty dinner!
Turkey was juicy and tender and had a great smoke flavor.
This was the shortest time frame I would attempt, but it was very successful.
Get you Harvest Brine in time for Thanksgiving.
